✅ Práctica 24
- Github Repositories
- ▷ #TSCLab #TCLab #ESP32 #Arduino #Control #MACI
- When using this resource, please cite the original publication:
En el siguiente blog se presenta la cuadragésima primera práctica del laboratorio de control de temperatura y velocidad de un motor.
Objetivo general:
- Sensar datos y subirlos a la Realtime Database de Firebase
Materiales:
- Firebase
- TSC-Lab
Introducción:
Firebase es una plataforma para el desarrollo de aplicaciones web y aplicaciones móviles lanzada en 2011 y adquirida por Google en 2014. Es una plataforma ubicada en la nube, integrada con Google Cloud Platform, que usa un conjunto de herramientas para la creación y sincronización de proyectos que serán dotados de alta calidad, haciendo posible el crecimiento del número de usuarios y dando resultado también a la obtención de una mayor monetización.
Y en la presente práctica se pretende utilizar la Realtime Database, una base de datos NoSQL alojada en la nube que te permite almacenar y sincronizar datos entre tus usuarios en tiempo real. Para ello, se sensará la temperatura y se subirá dicho valor junto al pwm del heater, dichos datos será ordenados por fecha y hora.
Procedimiento:
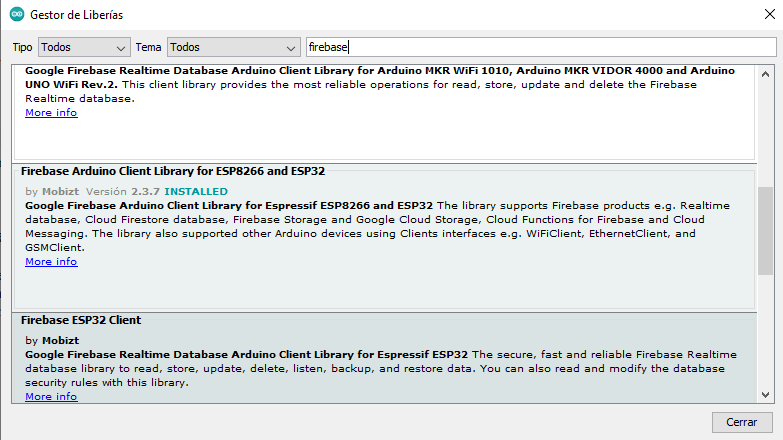
Nota: se debe tener iniciado sesión en la cuenta de Google. Se asume que se tiene instaladas las librerías de las prácticas anteriores y adicional se debe instalar la librería Firebase Arduino Client for ESP8266 and ESP32, versión 2.3.7 (se recomienda esta versión para evitar posibles fallas).
Los pasos para realizar la presente práctica, son los siguientes:
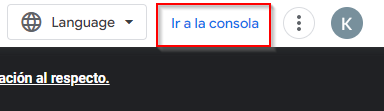
- Ir a Firebase (google.com) y en la parte superior derecha seleccionar Ir a la consola.
- Si es la primera vez que utiliza Firebase, le aparecerá una pantalla como la siguiente y se debe seleccionar Crear un proyecto.
- Coloque un nombre al proyecto, acepte las condiciones, confirme el uso de Firebase y de clic en Continuar.
- Habilite Google Analytics y clic en Continuar.
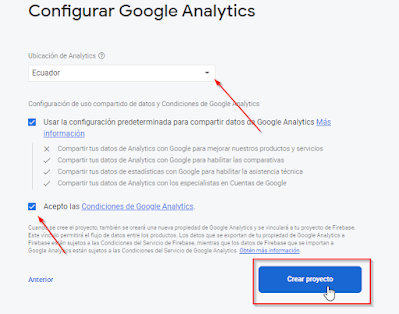
- Configure Google Analytics, seleccione como ubicación Ecuador, acepte las condiciones y clic en Crear proyecto.
- Se procederá a crear el proyecto y aparecerá una pantalla como la que se muestra a continuación y se debe dar clic en Continuar.
- En la parte izquierda de la pantalla, se debe dar clic en Compilación, se desplegarán varias opciones y se debe dar clic en Realtime Database.
- Dar clic en Crear una base datos.
- Escoger Estados Unidos como ubicación y clic en Siguiente.
- Por esta ocasión seleccionar Comenzar en modo de prueba y clic en Habilitar.
- Crear un método de autentificación.
- Clic en comenzar.
- Seleccionar "Anónimo".
- Habilitar el switch y guardar.
- Copiar el siguiente código al IDE de Arduino, pero aún no lo cargue al TSC-Lab.
This file contains hidden or bidirectional Unicode text that may be interpreted or compiled differently than what appears below. To review, open the file in an editor that reveals hidden Unicode characters.
Learn more about bidirectional Unicode characters
#include <WiFi.h> | |
#include <Firebase_ESP_Client.h> | |
//Provide the token generation process info. | |
#include "addons/TokenHelper.h" | |
//Provide the RTDB payload printing info and other helper functions. | |
#include "addons/RTDBHelper.h" | |
// Insert your network credentials | |
#define WIFI_SSID "your_ssid" | |
#define WIFI_PASSWORD "your_password" | |
// Insert Firebase project API Key | |
#define API_KEY "your_apikey" | |
// Insert RTDB URLefine the RTDB URL */ | |
#define DATABASE_URL "your_rtdb_url" | |
//Define Firebase Data object | |
FirebaseData fbdo; | |
FirebaseAuth auth; | |
FirebaseConfig config; | |
unsigned long sendDataPrevMillis = 0; | |
int count = 0; | |
bool signupOK = false; | |
String path = "TSC-Lab"; | |
String temp_fb; | |
String pwm_fb; | |
//temperatura sensor | |
#include <OneWire.h> | |
#include <DallasTemperature.h> | |
//GPIO pin 4 is set as OneWire bus | |
OneWire ourWire1(4); | |
//A variable or object is declared for our sensor 1 | |
DallasTemperature sensors1(&ourWire1); | |
//pins of transistor | |
int trans1 = 17; | |
//temperature var | |
float temp1; | |
int dutyCycle1 = 255; | |
// Setting PWM properties | |
const int freq = 30000; | |
const int pwmChannell = 0; | |
const int resolution = 8; | |
//time and date | |
#include "time.h" | |
const char* ntpServer = "pool.ntp.org"; | |
unsigned long epochTime; | |
struct tm timeinfo; | |
void setup() { | |
Serial.begin(115200); | |
WiFi.begin(WIFI_SSID, WIFI_PASSWORD); | |
Serial.print("Connecting to Wi-Fi"); | |
while (WiFi.status() != WL_CONNECTED) { | |
Serial.print("."); | |
delay(300); | |
} | |
Serial.println(); | |
Serial.print("Connected with IP: "); | |
Serial.println(WiFi.localIP()); | |
Serial.println(); | |
//Hora | |
configTime(-18000, 0, ntpServer); | |
//Debe configurarse por primera vez la hora para empezar | |
if(!getLocalTime(&timeinfo)){ | |
Serial.print("No hay acceso a Internet en la red: "); | |
Serial.println(WIFI_SSID); | |
Serial.println("No se puede obtener la hora actual. Revise el WiFi"); | |
while(!getLocalTime(&timeinfo)); | |
} | |
/* Assign the api key (required) */ | |
config.api_key = API_KEY; | |
/* Assign the RTDB URL (required) */ | |
config.database_url = DATABASE_URL; | |
/* Sign up */ | |
if (Firebase.signUp(&config, &auth, "", "")) { | |
Serial.println("ok"); | |
signupOK = true; | |
} | |
else { | |
Serial.printf("%s\n", config.signer.signupError.message.c_str()); | |
} | |
/* Assign the callback function for the long running token generation task */ | |
config.token_status_callback = tokenStatusCallback; //see addons/TokenHelper.h | |
Firebase.begin(&config, &auth); | |
Firebase.reconnectWiFi(true); | |
//sensor | |
sensors1.begin(); //Sensor 1 starts | |
// configure LED PWM functionalitites | |
ledcSetup(pwmChannell, freq, resolution); | |
// attach the channel to the GPIO to be controlled | |
ledcAttachPin(trans1, pwmChannell); | |
ledcWrite(pwmChannell, dutyCycle1); | |
//hora | |
} | |
void loop() { | |
readData(); | |
epochTime = getEpoch(); //fecha en formato UNIX/EPOCH | |
writeFirebase(); | |
} | |
void writeFirebase() { | |
if (Firebase.ready() && signupOK && (millis() - sendDataPrevMillis > 1000 || sendDataPrevMillis == 0)) { | |
sendDataPrevMillis = millis(); | |
temp_fb = path + "/" + epochTime + "/temperature/"; | |
// Write temperature | |
if (Firebase.RTDB.setFloat(&fbdo, temp_fb.c_str(), temp1)) { | |
Serial.println("PASSED"); | |
Serial.println("PATH: " + fbdo.dataPath()); | |
Serial.println("TYPE: " + fbdo.dataType()); | |
} | |
else { | |
Serial.println("FAILED"); | |
Serial.println("REASON: " + fbdo.errorReason()); | |
} | |
pwm_fb = path + "/" + epochTime + "/pwm/"; | |
// Write pwm | |
if (Firebase.RTDB.setInt(&fbdo, pwm_fb.c_str(), dutyCycle1)) { | |
Serial.println("PASSED"); | |
Serial.println("PATH: " + fbdo.dataPath()); | |
Serial.println("TYPE: " + fbdo.dataType()); | |
} | |
else { | |
Serial.println("FAILED"); | |
Serial.println("REASON: " + fbdo.errorReason()); | |
} | |
} | |
} | |
void readData() { | |
//The command is sent to read the temperature | |
sensors1.requestTemperatures(); | |
//Obtain the temperature in ºC of sensor 1 | |
temp1 = sensors1.getTempCByIndex(0); | |
} | |
unsigned long getEpoch() { | |
time_t now; | |
if (!getLocalTime(&timeinfo)) { | |
return(0); | |
} | |
time(&now); | |
return now; | |
} |
Repositories: https://github.com/vasanza/TSC-Lab/tree/main/Practice41
- Copiar el URL del proyecto y pegarlo en la línea 20 del código (variable FIREBASE_HOST) previamente copiado.
- En la parte izquierda de la pantalla, dar clic aquí:
- Cambiar las credenciales del WiFi y cargar el código al TSC-Lab.
- Una vez subido el código, en la sección de Realtime Database se podrá visualizar la carga de datos.
Comments
Post a Comment